Learn how to take a standard photo and convert it into a pencil drawing in Photoshop, creating a piece of art just like the pros.
In this Photoshop tutorial you’ll learn how to turn a photo into a line drawing effect in Photoshop. By the end you’ll be able to turn any photo into work of art, just like the pros, presenting your photo in a newly artistic way.
It’s best to use an image with a white background to get the best effect. If that’s not the case with your image, start with our tutorial that shows you the step-by-step process for removing the background.
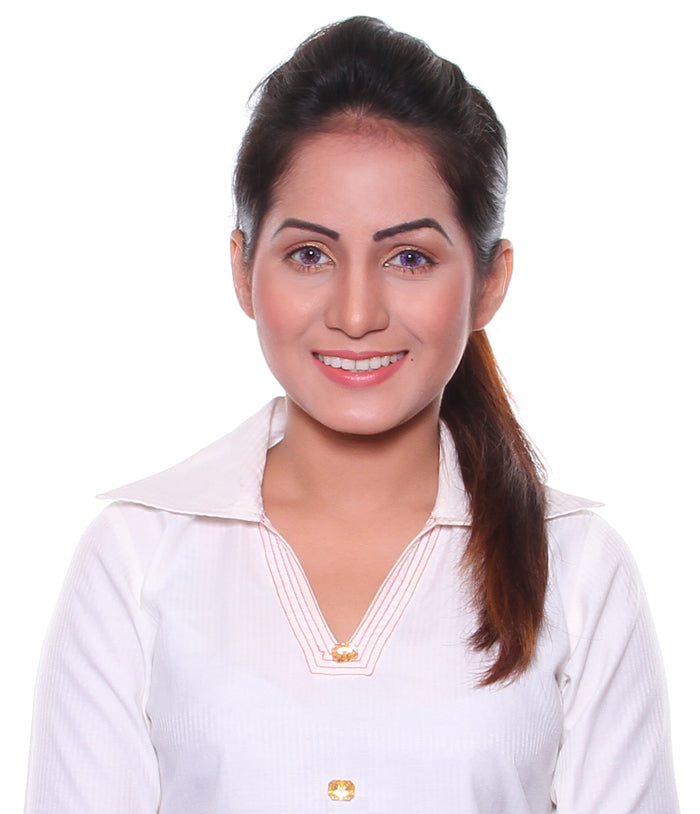
Duplicate background layer:
Begin by duplicating the background layer. If you’re not sure how to do this, start with our tutorial that teaches you all you need to know about layers in Photoshop.
Convert color photo to black & white:
Convert the color photo to black and white by clicking on the duplicate background layer, choose Black and White, and then click the double arrow to close the panel.

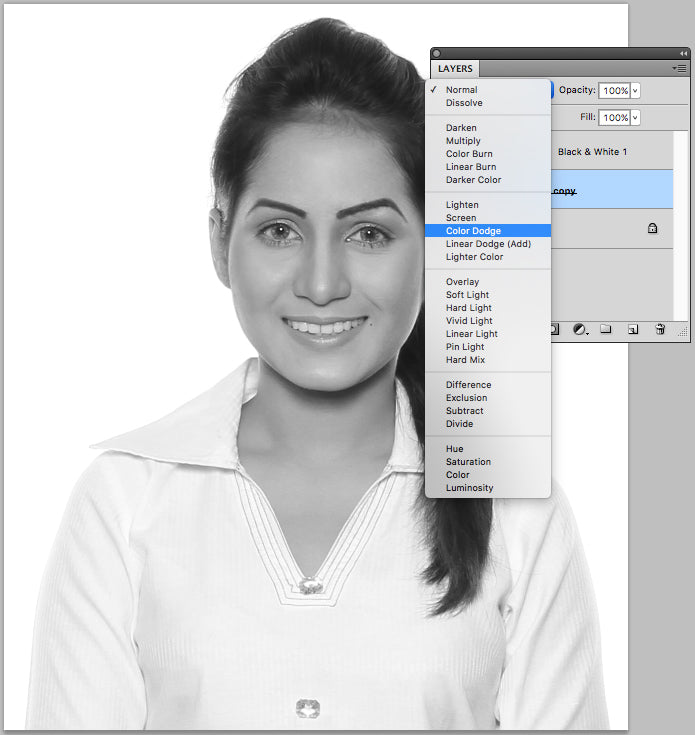
Change blending mode:
Return to the background copy layer, click Blending mode and choose Color Dodge. This will give you a screen will more contrast.
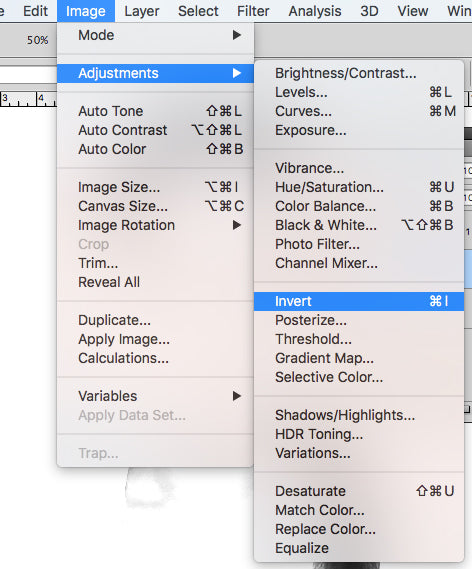
Invert the photo:
To reverse or invert the black and white of the image, similar to how you would view a negative piece of film, press Ctrl + I or go to Image > Adjustment > Invert.

You will then see that everything disappears.

Convert the layer to smart object:
Right click on the layer converted black and white layer and choose Convert to Smart Object.

Apply Gaussian blur:
Next, apply Gaussian Blur. Go to Filter > Blur > Gaussian blur to make the object.

Adjust Gaussian blur window:
By blurring the image you can begin to see the outline of the image’s subject, which forms the foundation of the line drawing. Set the radius at 6.4 and adjust it slightly to see which works best for you. Then click OK.
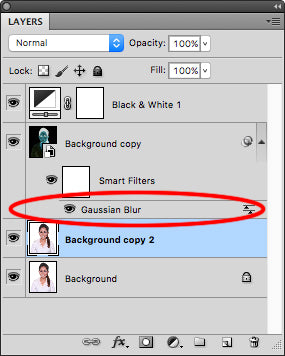
Gaussian blur window is in the layer panel:
Within the layers panel you can see that the Gaussian Blur adjustment area if you want to tweak the level of blur to your desire.
Simple line drawing effect:
You stop right here with this line drawing effect if you’re going for something simple, but we recommend you keep going to get a more detailed line drawing.

Duplicate background copy layer:
From here, create another copy of the background layer by clicking the background copy box, then click Ctrl+J.
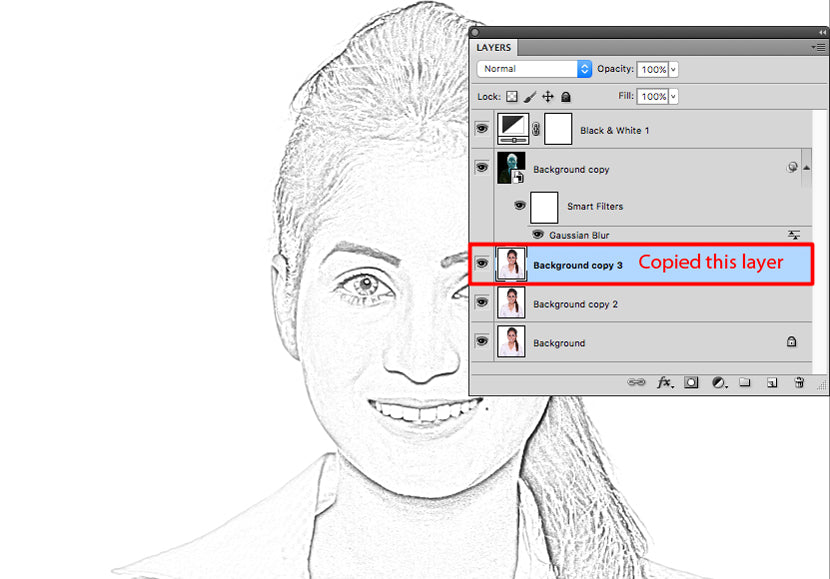
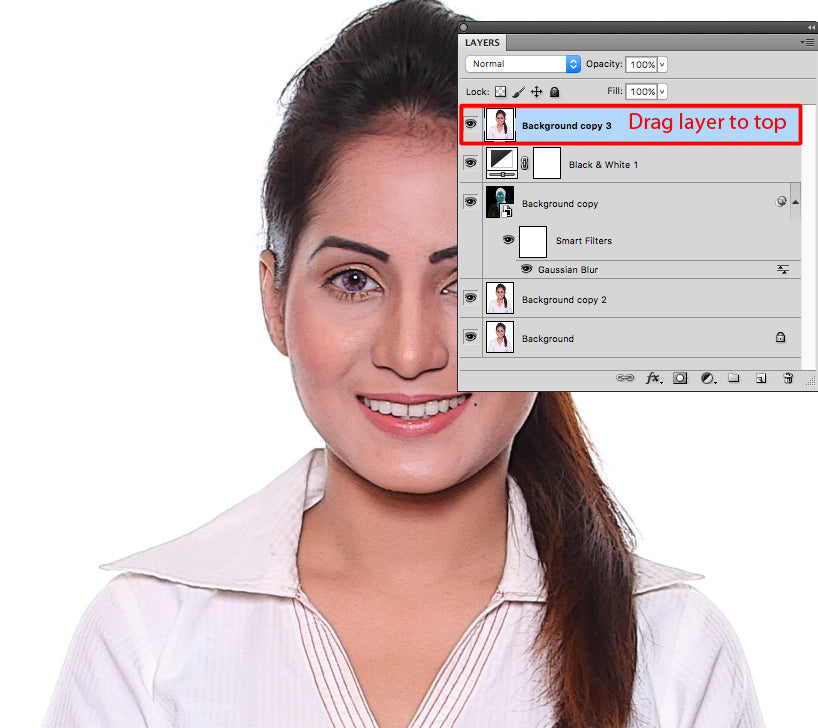
Drag layer to top:
Click and drag the newly created duplicate layer to the top of the window.
If your Photoshop tasks are beginning to stack up on your to do list, no worries! Clipping Path India’s Photoshop experts can save you time, optimizing and delivering your images in just 24 hours. Get your free quote today!
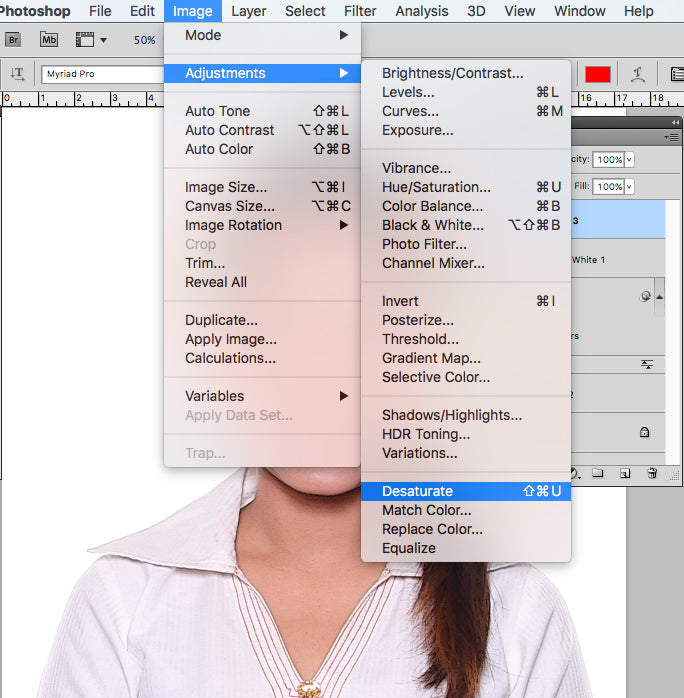
Desaturate top layer:
Desaturate that layer by clicking Image > Adjustments > Desaturate.
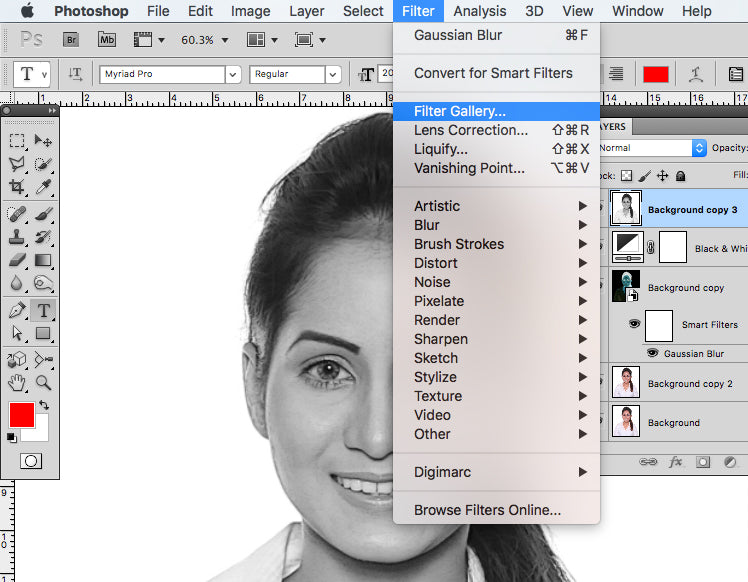
Apply filter gallery:
Click Filter > Filter Gallery, and then Stylize. This will create another negative looking effect and allows you to see the outline of the image in white.
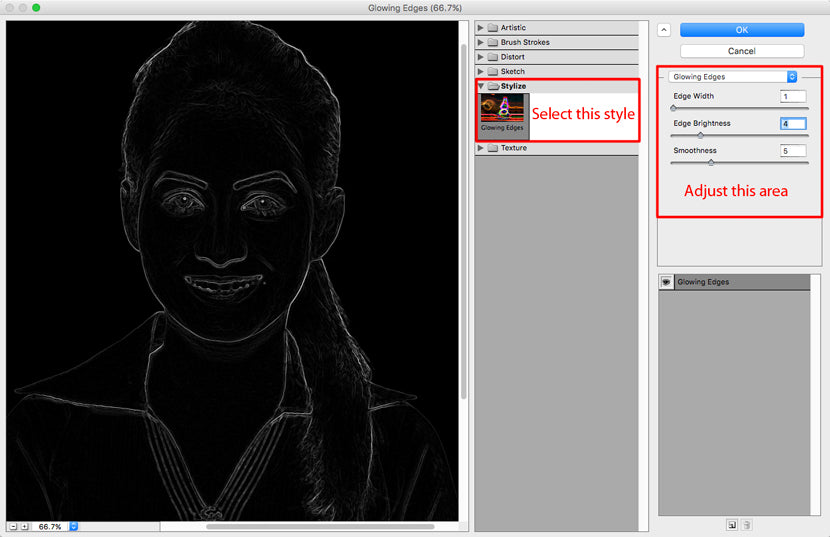
Adjust style in filter gallery:
Now you’re getting closer to a pencil line drawing. You can adjust the edges to find the width of line that you desire. Next, work on smoothing out the edge and the brightness factor. We recommend using an Edge Width of 1, Edge Brightness of 4 and Edge Smoothness to 6. Click OK when finished.
The image is still invert in negative form. Let’s change it back.
Invert the image:
Click Ctrl+I or go to Image > Adjustment > Invert to revert the image back black lines on white background.
Change blending mode to multiply:
To remove the white pixels and keep the black pixels, you will use Blend Mode. This causes the white pixels to become invisible and the darker pixels to remain.
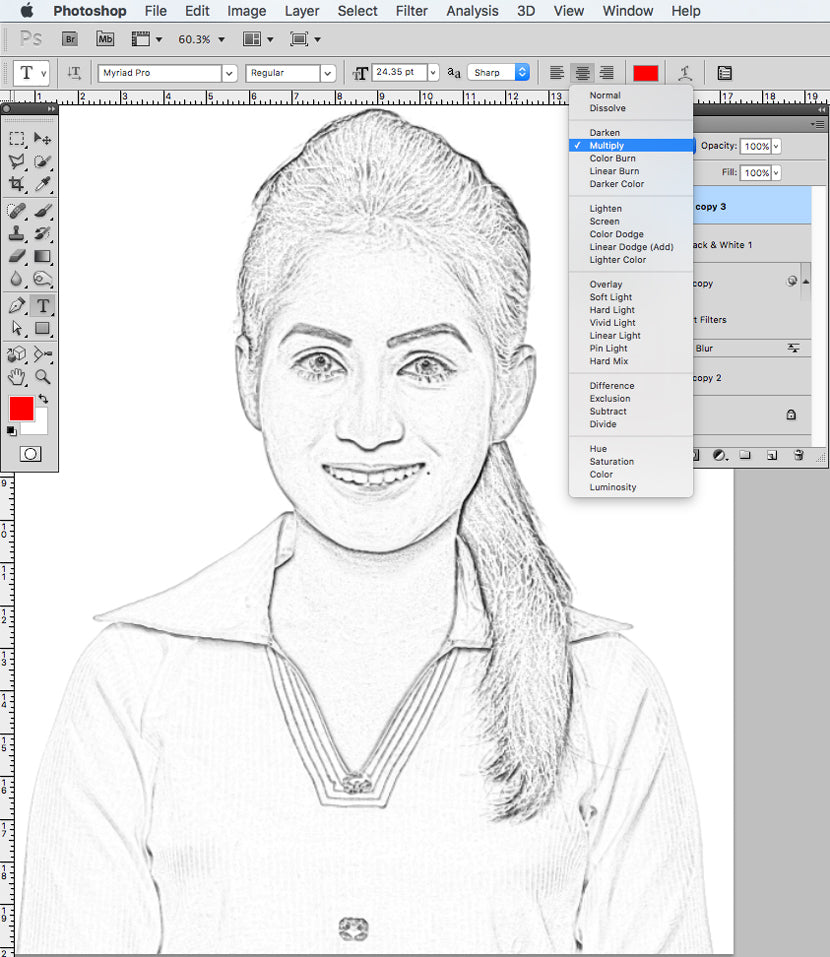
You have now just created the actual outline for your drawing.
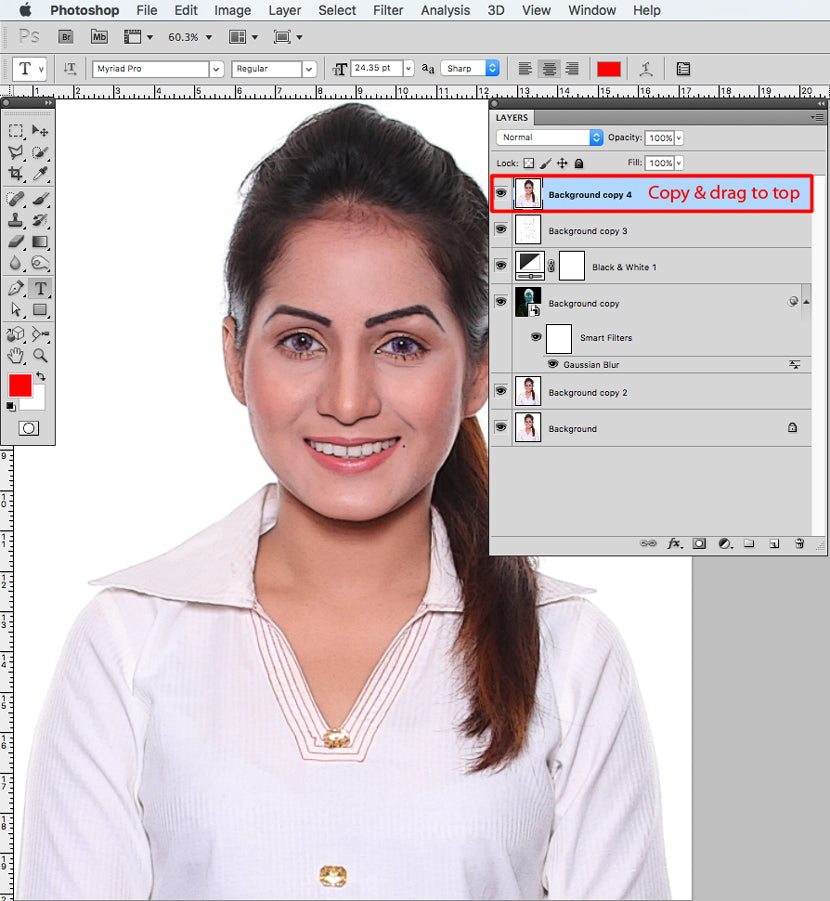
Add shading to the existing line drawing:
To add shading to the existing line drawing to add more realistic depth and make it three dimensional, click on your background layer again and drag the duplicate drawing up to the top of the layers screen.
Desaturate the image:
Desaturate the image like you did before clicking Ctrl+shift+U.

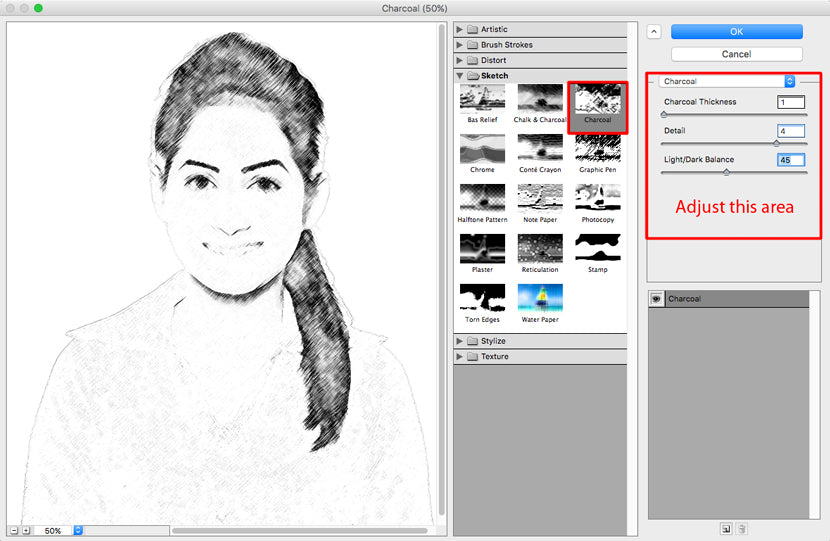
Apply filter gallery:
Click Filter > Filter gallery. A Sketch section window will appear. Select Charcoal. This will create an etching effect that is similar to the appearance of pencil drawings. Set the Edge at 1, Details at 4, and Light and Dark around 46 to 48. You can adjust these settings accordingly depending on your taste. Click OK.
Change blending to multiply:
In this last step you want to remove the white and get the final effect closer to a line drawing. Go back to the Blend mode and change it to Multiply.

You now have more defined the characteristics of a line drawing!
So there you have it, you now know how to create a line drawing in Photoshop. As you continue to improve your skill, you’ll get faster and better at this process.
clipping path service
clipping path service
clipping path service
photoshop face swap
face swap photoshop
how to swap heads in photoshop
how to create a drop shadow in photoshop
reduce image size without losing quality photoshop
best camera for product photography
amazon image requirements
swap face in photoshop
convert to vector
amazon picture requirements
hair background
digital photos backgrounds
shoe photography
photoshop remove all white
face swap photo editor
change heads in photoshop
clipping path in photoshop
photoshop clipping paths
swapping faces in photoshop
reduce file size photoshop
how to swap faces in photoshop
reduce image file size photoshop
how to change file size in photoshop
how to replace sky in photoshop
magic wand tool in photoshop
reduce image size photoshop
sky replacement photoshop
blue background photoshop
product photography background
photoshop sky replacement
photoshop clipping paths
photoshop practice photos
product dimensions on amazon
amazon image size requirements
best size for amazon images
amazon image guidelines
portrait photography white background
photoshop clothing
off white backgrounds
blue photoshop background
ebay photo dimensions
amazon photo requirements
photoshoot style
what is photo editing
500x500 background
pen tool icon
auto face swap
etsy photos size
masking magic
how to face swap
ecommerce photo
product background
mannequin images
path images
image masking
ebay image size
etsy photo size
ebay picture size
photoshop reduce file size
ecommerce photography
etsy listing photo size
amazon product image requirements
amazon image requirements
photoshop practice pictures
reduce file size in photoshop
best camera for product photography
product dimensions amazon format
photoshop reduce image size
amazon product image size
hair transparent background
photoshop practice images
best image size for ebay
sky background images for photoshop
off-white background
beauty product photography
how to reduce image file size in photoshop
magic wand tool photoshop cs6
how to use photoshop cs6
how to change background color in photoshop cs6
how to remove white background in photoshop cs6
how to change background in photoshop cs6
how to reduce image size in photoshop without losing quality
how to get rid of whitespace in photoshop
how to take pictures for amazon
how to change the sky in photoshop
photoshop cs6 change background color
how to replace a sky in photoshop
how to photoshop faces onto things
how to photoshop a face onto another body
remove background color photoshop
how to blend faces in photoshop
how to do a face swap in photoshop
how to put a picture on a background in photoshop
clipping path service
clipping path service
photoshop face swap
face swap photoshop
how to swap heads in photoshop
how to create a drop shadow in photoshop
reduce image size without losing quality photoshop
best camera for product photography
amazon image requirements
swap face in photoshop
convert to vector
amazon picture requirements
hair background
digital photos backgrounds
shoe photography
photoshop remove all white
face swap photo editor
change heads in photoshop
clipping path in photoshop
photoshop clipping paths
swapping faces in photoshop
reduce file size photoshop
how to swap faces in photoshop
reduce image file size photoshop
how to change file size in photoshop
how to replace sky in photoshop
magic wand tool in photoshop
reduce image size photoshop
sky replacement photoshop
blue background photoshop
product photography background
photoshop sky replacement
photoshop clipping paths
photoshop practice photos
product dimensions on amazon
amazon image size requirements
best size for amazon images
amazon image guidelines
portrait photography white background
photoshop clothing
off white backgrounds
blue photoshop background
ebay photo dimensions
amazon photo requirements
photoshoot style
what is photo editing
500x500 background
pen tool icon
auto face swap
etsy photos size
masking magic
how to face swap
ecommerce photo
product background
mannequin images
path images
image masking
ebay image size
etsy photo size
ebay picture size
photoshop reduce file size
ecommerce photography
etsy listing photo size
amazon product image requirements
amazon image requirements
photoshop practice pictures
reduce file size in photoshop
best camera for product photography
product dimensions amazon format
photoshop reduce image size
amazon product image size
hair transparent background
photoshop practice images
best image size for ebay
sky background images for photoshop
off-white background
beauty product photography
how to reduce image file size in photoshop
magic wand tool photoshop cs6
how to use photoshop cs6
how to change background color in photoshop cs6
how to remove white background in photoshop cs6
how to change background in photoshop cs6
how to reduce image size in photoshop without losing quality
how to get rid of whitespace in photoshop
how to take pictures for amazon
how to change the sky in photoshop
photoshop cs6 change background color
how to replace a sky in photoshop
how to photoshop faces onto things
how to photoshop a face onto another body
remove background color photoshop
how to blend faces in photoshop
how to do a face swap in photoshop
how to put a picture on a background in photoshop
Good job!!! Looked with pleasure
ReplyDeleteClipping Path |
Clipping Path, shadow-service |
shadow service |
Image Masking Service |
Image Manipulation Service |
color-correction |
web-image-optimization |
background remove services |
retouching service |